• Welcome to https://albinowners.net, the new home of Albin Owners Group!
• You will need to log in here, and you may want to bookmark this site. If you don't remember your password, use the I forgot my password link to reset it.
• All content has been transferred from our previous site. Digests will be enabled soon.
Contact Us if you have any questions or notice a problem. If you're not receiving our email, include a phone number where we can text you.

Albin 36 - Reference & Maintenance

Post Reply
cdsailor
Gold Member
Gold Member
Posts: 106
Joined: Fri Sep 08, 2017 9:05 pm
Home Port: St Joseph

Albin 36 - Reference & Maintenance

Post by cdsailor »

I like information. I like boats. I especially like information about boats, particularly a boat I own or maintain. This site and the trawler forums have provided some insight into maintaining and improving our Albin 36. In an effort to encourage the popularity of these boats and to provide potentially helpful information for (prospective) owners, I offer this thread and Molly's new blog, both of which I will update as I have time and information.

First, our blog - more info to come: https://molly1979albin36blog.blogspot.com/

Second, here's a photo of the Albin 36 deck composition for reference. I removed this plug when I installed a deck pumpout fitting near the lazarette. Observations? Deck core in this area was dry, although the layup itself seemed a little dry, meaning that neither the top nor the bottom fiberglass skins were well-adhered to the plywood core.

Image

If you happen to stop by the blog, drop us a comment to let us know you did!

David
Last edited by cdsailor on Sun Apr 19, 2020 8:01 am, edited 3 times in total.
cdsailor
Gold Member
Gold Member
Posts: 106
Joined: Fri Sep 08, 2017 9:05 pm
Home Port: St Joseph

Re: Molly, '79 Albin 36 - Reference Thread

Post by cdsailor »

After a few rough days in a lousy marina, Molly's cleats began to show signs of failure, particularly her port stern cleat. I installed two new cleats - properly backed and bedded - and removed the original cleats mounted on teak pads. This is what the original fasteners looked like after the teak pad, which was not fastened to the deck, shifted and bent the cleat fasteners.

Image

Fastening the teak pads to the deck, with either epoxy or screws, would have made this scenario much less likely. For the time being, I refastened and bedded the original cleat directly to the deck with new 1/4"-20 fasteners and a 3/4" backing block. From the factory, Albin backed the cleats with four aluminum tabs, much like glorified fender washers, which were inadequate for heavier/sharper loads.

For a bit more information, read this: https://molly1979albin36blog.blogspot.c ... -isnt.html
cdsailor
Gold Member
Gold Member
Posts: 106
Joined: Fri Sep 08, 2017 9:05 pm
Home Port: St Joseph

Re: Molly, '79 Albin 36 - Reference & Maintenance

Post by cdsailor »

I know of at least one other 36 owner who tackled the anchor locker bulkhead repair/replacement - Boatmon, aboard his '82, The Lass (view thread here: viewtopic.php?p=24690#p24690 and his website here http://albinrestoration.blogspot.com/).

Our repair comes as no surprise; We'd noted the water damage and rot when we purchased Molly. After watching her samson post work back and forth during high surge in the marina, we decided that this winter was the time for the repair. The samson post is far too critical a piece of hardware to ignore, so yesterday I started the job.

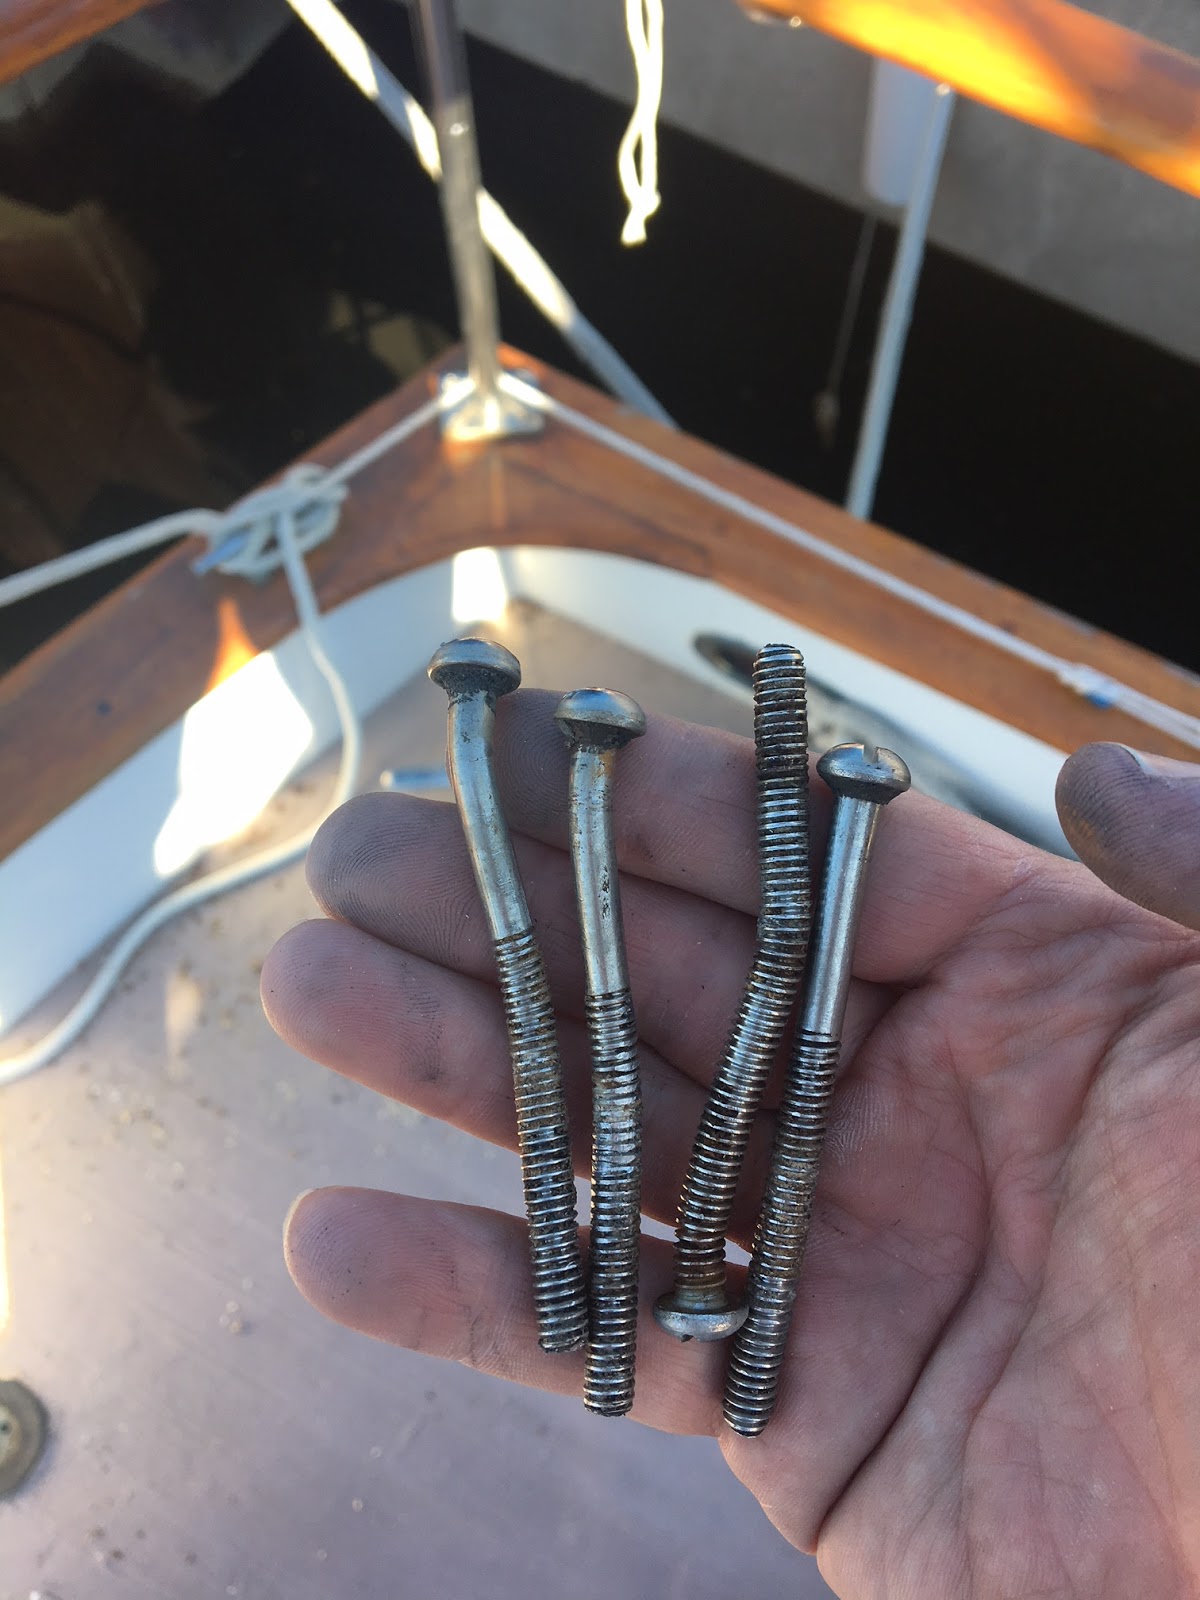
Pulling the shelving and trim (for reuse) was probably the most time-consuming part of the job, particularly without damaging the aft main bulkheads in the v-berth. Once those parts were out of the way, I used an oscillating tool to cut away the tabbing, freeing the bulkhead.

A couple observations for those of you who don't want to make this repair on your 36:
1) Molly's anchor locker DOES have a drain, a piece of tube set in a resinous base. It is routed down the stem and into the forward bilge.
2) Her drain sits about 2" HIGHER than the resinous base - i.e., anchor locker floor, meaning that any collected water will drain into the bilge only after it reaches 2" deep. Thus, until it evaporates or soaks into the bulkhead, water will pool in the bottom of the anchor locker. This could have been prevented years ago by cutting the drain tube flush with the resinous base.
3) Checking and renewing regularly the seal between the samson post and the deck will stop any leaks from topsides BEFORE they have a chance to cause damage to the samson post (and core of the foredeck, by the way).
4) NO fiberglass extends from the resinous base up the bulkhead, meaning water is in direct contact with the bulkhead.
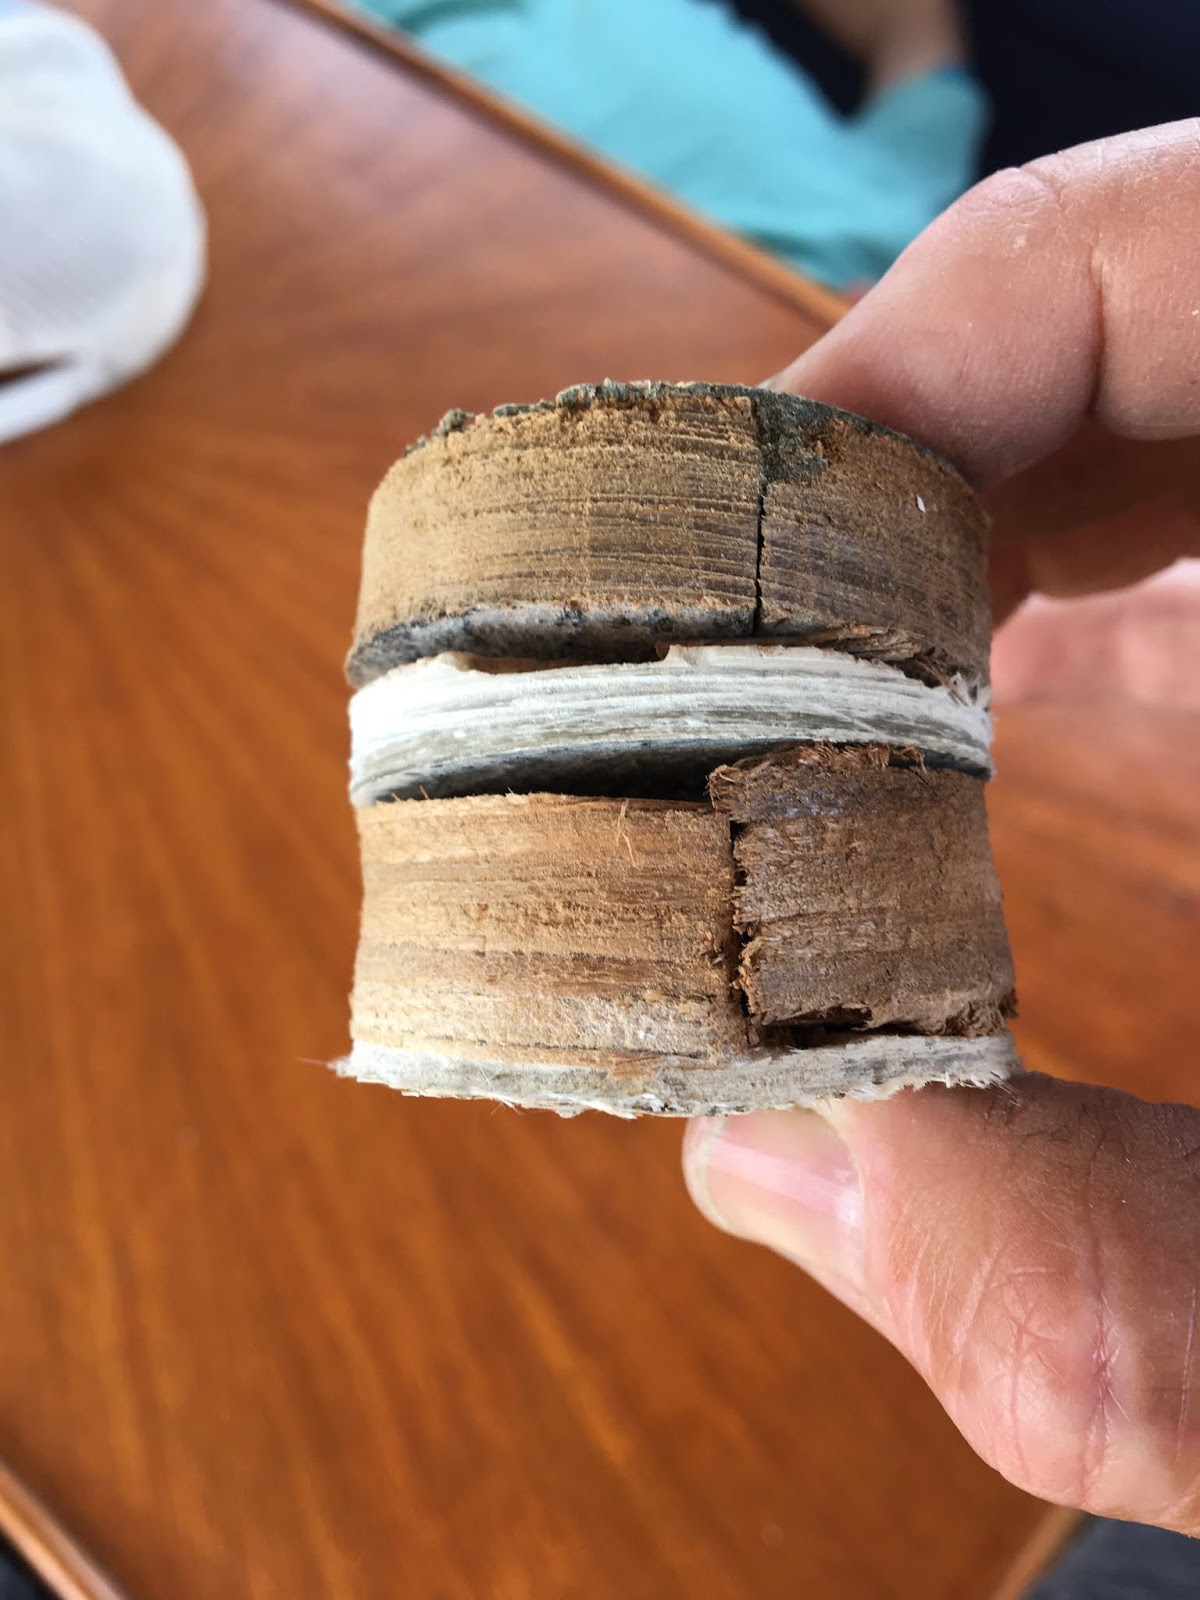
5) Not surprisingly, rotted portions of the samson post were areas not easily inspected: at the base in the thickened resin, and where the post passes through the deck.

As far as the anatomy of the bulkhead and samson post:
- The bulkhead was tabbed on both sides, which was better build quality than I'd expected
- The samson post base rests against the stem and is held in place by thickened resin that was packed around the post to form the bottom of the anchor locker.
- The drain tube was set in this thickened resin.
- There was a void area under the thickened resin which could (and probably did) trap some water against the bottom portion of the bulkhead.

I will update as work continues. The plan for now is to grind down the remaining tabbing, remove the samson post, pattern a new bulkhead, make a new samson post, and reinstall all the pieces.
You do not have the required permissions to view the files attached to this post. To view images, please register for a free account.
cdsailor
Gold Member
Gold Member
Posts: 106
Joined: Fri Sep 08, 2017 9:05 pm
Home Port: St Joseph

Re: Molly, '79 Albin 36 - Reference & Maintenance

Post by cdsailor »

I continued work today and removed the Samson post. I also began cutting away at what I thought was a resinous base surrounding the post. It turns out it is layer upon layer of CSM with a resin top, presumably poured in to "finish" and level the anchor locker.

On the positive side, there was/is so much glass surrounding the base of the Samson post, those things are practically bombproof - if they're not rotted. On the negative side, removing that mess is a pain. I've used a combination of an oscillating tool and sawzall to remove some chucks, but it takes work.

The bottom 12-15" inches of the post was rotted and saturated with water - as in dripping. Not surprisingly, the deck core around both the Samson post and a hawse pipe are also wet and rotted. Had these areas been properly bedded and inspected/rebedded regularly, much of this work could have been avoided. A cautionary tale, friends.

One other point related to post and bulkhead damage is the anchor locker drain. If yours sits higher than the locker floor, cut it flush immediately to let the water drain to the bilge.
You do not have the required permissions to view the files attached to this post. To view images, please register for a free account.
cdsailor
Gold Member
Gold Member
Posts: 106
Joined: Fri Sep 08, 2017 9:05 pm
Home Port: St Joseph

Re: Molly, '79 Albin 36 - Reference & Maintenance

Post by cdsailor »

Put together a video version of the repair so far: https://youtu.be/blLRds0URaw
cdsailor
Gold Member
Gold Member
Posts: 106
Joined: Fri Sep 08, 2017 9:05 pm
Home Port: St Joseph

Twin-engine Albin 36 cutless bearings

Post by cdsailor »

After removing Molly's props for scanning and potential repair, it was evident that her starboard shaft needed to be pulled and checked for straightness. The aft strut cutless bearing showed signs of wear as well, so I prepped the shaft for removal, which included removing the coupling, raising the rudder (since the shaft wouldn't slide aft without it out of the way), and pulling the shaft aft and out of position. Everything went smoothly, although the process did take a couple hours.

For any other twin-engine owner who might one day face this job, there are a couple points to make the process less of a mystery.
1) Raising the rudder is easier than dropping it. I disconnected the steering arm from the rudder post and hydraulic ram, removed the nuts holding the rudder packing gland in place, and from below worked the rudder up toward the hull until the blade was touching, the rudder angled for maximum upward travel. I rested the blade on a piece of wood to hold it in place and then pulled the shaft aft and out.
2) With the shaft stuffing box hose removed from the shaft log, I confirmed my suspicion that there is a third bearing located inside the shaft log. I have yet to discover how to remove that bearing, but I suspect I shall.

IMG_5813.JPG
Rudder packing and post.
IMG_5815.JPG
IMG_5817.JPG
IMG_5818.JPG
IMG_5825.JPG
Bearing visible in shaft log.
You do not have the required permissions to view the files attached to this post. To view images, please register for a free account.
davb1947
Gold Member
Gold Member
Posts: 26
Joined: Mon Sep 04, 2017 2:52 pm
Home Port: St. Joseph, MI
Contact:

Re: Molly, '79 Albin 36 - Reference & Maintenance

Post by davb1947 »

I’m amazed at the lack of response here!
Dave
Albin 36
Molly
jashmen
Gold Member
Gold Member
Posts: 102
Joined: Fri Sep 28, 2018 11:02 am
Home Port: bayville, nj

Re: Molly, '79 Albin 36 - Reference & Maintenance

Post by jashmen »

I, personally, am in awe of your skills and at the same time terrified as to what my 78 might be hiding.
cdsailor
Gold Member
Gold Member
Posts: 106
Joined: Fri Sep 08, 2017 9:05 pm
Home Port: St Joseph

Re: Molly, '79 Albin 36 - Reference & Maintenance

Post by cdsailor »

jashmen wrote: Mon May 06, 2019 11:57 am I, personally, am in awe of your skills and at the same time terrified as to what my 78 might be hiding.
Well, thank you, Jeffrey. If I've learned one thing in the midst of my projects it's this: there are some things that can be left alone - potentially for years and years. Wet core isn't terminal. Neither are leaking windows. Fix what you can as you can. And enjoy your boat!
cdsailor
Gold Member
Gold Member
Posts: 106
Joined: Fri Sep 08, 2017 9:05 pm
Home Port: St Joseph

Re: Molly, '79 Albin 36 - Reference & Maintenance

Post by cdsailor »

Molly's foredeck and anchor locker bulkhead went back together a few months ago. I recored the foredeck with 5/8" meranti marine plywood bedded in thickened epoxy and covered with alternating layers of 1708 biaxial with mat and 12 oz biaxial. In the area of the samson post and anchor hawse pipe, I installed solid fiberglass sheet to protect the core from potential future water ingress.

I laminated a new white oak samson post and heavily glassed the base of the post into the forepeak with several layers of 1708. I also glassed the post to the deck and notched it to fit the original bowsprit.

I used epoxy-coated 1/4" meranti marine ply for the new anchor locker bulkhead, glassing it to the hull on the fore and aft sides, and cut a new access door. Things are stout and watertight. I'm pleased with the project.
AFABB7D3-DAF8-4E07-A6E6-063127FA40C9.JPG
70528907_10157416794363497_3708590370448211968_n.jpg
70449040_10157416794588497_8489683492601331712_n.jpg
70190917_10157416794213497_8899517926344753152_n.jpg
69925189_10157416794233497_4705871150830321664_n.jpg
You do not have the required permissions to view the files attached to this post. To view images, please register for a free account.
Capt Kirt
Gold Member
Gold Member
Posts: 15
Joined: Sun Mar 24, 2013 4:37 pm
Home Port: Slidell, La
Location: Slidell, La

Re: Molly, '79 Albin 36 - Reference & Maintenance

Post by Capt Kirt »

Hello I enjoyed reading your post and pictures. I am about to embark on the same project. Unfortunately my boat is a rescue from the crusher and many pieces have been removed prior to my acquiring it. So collecting information prior to striking out to tackle a project is important. Thanks again and please continue to post further adventures.

Kirt

PS What are the dimensions of the Samson Post? Thanks
cdsailor
Gold Member
Gold Member
Posts: 106
Joined: Fri Sep 08, 2017 9:05 pm
Home Port: St Joseph

Re: Molly, '79 Albin 36 - Reference & Maintenance

Post by cdsailor »

Capt Kirt wrote: Tue Oct 15, 2019 9:17 am Hello I enjoyed reading your post and pictures. I am about to embark on the same project. Unfortunately my boat is a rescue from the crusher and many pieces have been removed prior to my acquiring it. So collecting information prior to striking out to tackle a project is important. Thanks again and please continue to post further adventures.

Kirt

PS What are the dimensions of the Samson Post? Thanks
Hi Kirt,

Great to see signs of life on here. The samson post - both original and replacement - are 4"x4". Overall length is, if I'm remembering correctly, about 69-1/2". I made the post long and didn't cut it to length until I'd conducted a dry fit.

Got any pics of your project?

Good luck.

David
User avatar
DCatSea
Gold Member
Gold Member
Posts: 900
Joined: Wed Aug 20, 2014 9:53 pm
Home Port: Alexandria VA
Location: Alexandria VA

Re: Molly, '79 Albin 36 - Reference & Maintenance

Post by DCatSea »

Wow! That's one heck of a task, and an amazing skill set you have to tackle it. Wish you were near here so i could a) see your work first-hand, b) pick your brains and c) borrow your tools. :-)
Your Kingpost looks great, and very capable.
Doug and Georgia
"Mazboot" - 1984 27 FC #142
Lehman 4D61
Tribe 9.5 yak
Jackson STAXX-11 yak
Alexandria City Marina - F-03
cdsailor
Gold Member
Gold Member
Posts: 106
Joined: Fri Sep 08, 2017 9:05 pm
Home Port: St Joseph

Re: Molly, '79 Albin 36 - Reference & Maintenance

Post by cdsailor »

DCatSea wrote: Sun Oct 20, 2019 7:37 am Wow! That's one heck of a task, and an amazing skill set you have to tackle it. Wish you were near here so i could a) see your work first-hand, b) pick your brains and c) borrow your tools. :-)
Your Kingpost looks great, and very capable.
Thank you, Doug and Georgia. I enjoyed the journey, and I'm happy to share what I learned.

David
cdsailor
Gold Member
Gold Member
Posts: 106
Joined: Fri Sep 08, 2017 9:05 pm
Home Port: St Joseph

Re: Molly, '79 Albin 36 - Reference & Maintenance

Post by cdsailor »

A bit more information about the foredeck recore. After removing the fasteners in the teak decking, I was able to pry the teak strips off in large "sheets" since most of the sealant/bedding beneath had failed long ago. With the decking out of the way, I marked a boundary line with masking tape that would leave plenty of original material to bevel for the eventual transition between my new layup and the existing deck/hull structure, and I cut through the top fiberglass skin with a circular saw set to the appropriate depth.

Like other Taiwanese trawlers, the core consists of approx 7"x7" plywood squares. Nearly all of them were completely delaminated from both the top and bottom fiberglass skins and all of them were saturated with water - well, in my case it was below freezing when I was working, so they were frozen solid. (And, by the way, the foredeck was NOT spongy or noticeably bouncy before starting this project.)

I removed all of the old core, including the portions under the perimeter I'd left for the taper, cleaned the area, sanded it well, ground the bevel around the perimeter, and bedded new core in thickened epoxy before covering the new core with 10 layers of alternating 1708 biaxial with mat and a 12 oz biaxial without mat. Final laminate thickness was about 3/8" to 1/2". I used four gallons of epoxy for all of my fiberglass work, which included not only the foredeck but the anchor locker, samson post, closing up some old thru hull holes, etc.

I also placed solid fiberglass sheet in the area of the samson post and the anchor hawse pipe to seal the new core and prevent water damage.
You do not have the required permissions to view the files attached to this post. To view images, please register for a free account.
Post Reply

Return to “36/37/40/43”