
If you can keep it dry...
I'm no expert here but I have used up a good part of a quart of epoxy just filling holes from rails, antennas, lights and masts on the WillieC hardtop, some of my own making and plenty from previous owners. Plenty of them were leaking into the core which is mainly some kind of pink foam. Thankfully.
Keep us posted!
• Welcome to https://albinowners.net, the new home of Albin Owners Group!
• You will need to log in here, and you may want to bookmark this site. If you don't remember your password, use the I forgot my password link to reset it.
• All content has been transferred from our previous site. Digests will be enabled soon.
• Contact Us if you have any questions or notice a problem. If you're not receiving our email, include a phone number where we can text you.
FAQ:
• Membership information
• Burgees
• How to post photos
• Membership information
• Burgees
• How to post photos
New Hard Top
-
WillieC
- Gold Member

- Posts: 2268
- Joined: Wed Nov 13, 2013 10:48 am
- Home Port: Hood Canal, WA
-
asuydam
- Deckhand

- Posts: 5
- Joined: Thu Nov 18, 2021 7:10 am
- Home Port: Solomons, Maryland
Re: New Hard Top
Ambler,
Thanks for your insight about the hardtop on a SC. I would probably have a hard job convincing the wife to take on another project before we even got to use the boat for the first time! I’ll revisit the subject of a hardtop later in the Spring when the weather warms up and you get closer to installing the new one.
Thanks for your insight about the hardtop on a SC. I would probably have a hard job convincing the wife to take on another project before we even got to use the boat for the first time! I’ll revisit the subject of a hardtop later in the Spring when the weather warms up and you get closer to installing the new one.
-
Ambler27FC
- Gold Member
- Posts: 195
- Joined: Sun Sep 08, 2019 8:10 pm
- Home Port: Patuxent River, MD
Re: New Hard Top
After a good amount of 'research' on the internet, I'm leaning into the following schedule:
Polyester Resin (Total Boat - which has measurable hardener amounts)
Outer layer: 3/4 oz CSM, 10 oz cloth, 3/4 oz CSM, 10 oz cloth, 3/4 oz CSM
Core: 3/4" Divinycel H80 Grid Score
Inner layer: 3/4 oz CSM, 10 oz cloth, 3/4 oz CSM, 10 oz cloth, 3/4 oz CSM
Planning to paint, but still debating gel coat as a protective layer for scratches. Driving this are the ideas that CSM gives you a better finish on the outside and is better for bonding to a core material. And I do like CSM - very flexible. Cloth for extra strength. I did some rough calculations and it looks like ~.090" deflection in the center (not considering the strength of the sides) under the weight of the heavy set-gentleman. Maybe a little spongy, but not sure I want to increase the weight beyond 140 lbs. Stresses seem minimal - fiberglass is wonderful material.
I was curious if anyone has done a big enough project to actually calculate resin ratios. I am tracking that cloth requires 2-2.5 times the cloth weight per square yard and CSM requires 1.5-2.0 times the cloth weight per square foot. I believe these numbers, but what is throwing me for a loop is an often re-posted table from a book that suggests cloth is 1:1 cloth/resin.
Winter has set in, so noodling with my mold for the next few months. If there is any stupid in the above, please point it out.
-
DesertAlbin736
- Gold Member
- Posts: 2729
- Joined: Sun Mar 09, 2014 3:58 pm
- Home Port: Peoria, AZ USA
Re: New Hard Top
Actually it sounds like a good plan. As for ratios, it's a matter of just wetting out the cloth/CSM, not too much, not too little. Gelcoat is a good idea, but you have to watch out for voids. On mine I had a number of thin spots & voids on the edges to be filled in with Marine Tex epoxy putty & ended up painting over the gelcoat. But a layer of gelcoat followed by an initial layer of cloth gives a smooth factory like surface.Winter has set in, so noodling with my mold for the next few months. If there is any stupid in the above, please point it out.
You can see that in this shot during the process of building and fitting teak ply opening hatches prior to final painting. Granted this was my first and so far only attempt at this kind of project. And it's a much smaller project than you're looking at.
This was the finished product after all the final touchups & painting with Interlux deck paint.
You do not have the required permissions to view the files attached to this post. To view images, please register for a free account.
La Dolce Vita
1971 Albin 25 #736
Yanmar 3GM30F
Gig Harbor Boatworks Nisqually 8 dinghy
Residence: Peoria, AZ
Homeport: Lake Pleasant, AZ & beyond
1971 Albin 25 #736
Yanmar 3GM30F
Gig Harbor Boatworks Nisqually 8 dinghy
Residence: Peoria, AZ
Homeport: Lake Pleasant, AZ & beyond
-
Ambler27FC
- Gold Member
- Posts: 195
- Joined: Sun Sep 08, 2019 8:10 pm
- Home Port: Patuxent River, MD
Re: New Hard Top
DA,
Very nice hard top! You may be more motivated than me - the amount of varnish-able wood I will tolerate decreases every year.
You're right on the resin amount - wet it out, but it will be an experiment. Just a hair worried b/c some of the cloth pieces will require close to a quart of resin. I've melted cups with 2 oz of poly gelcoat and will need to get real smart on mixing. I am going to use gelcoat, but still plan to paint - the gelcoat is fairing material at a minimum. Good inside curves are challenging.
Based on one of your photo's I've upgraded the garage heating an added two thermometers.
Most materials purchased, will report success or delayed success with lessons learned in 3-5 months.
-
DelawareJim
- Deckhand
- Posts: 8
- Joined: Sat Jan 08, 2022 11:42 am
- Home Port: Delaware
Re: New Hard Top
Your wife is a very wise woman!asuydam wrote: ↑Mon Jan 03, 2022 8:41 am Ambler,
Thanks for your insight about the hardtop on a SC. I would probably have a hard job convincing the wife to take on another project before we even got to use the boat for the first time! I’ll revisit the subject of a hardtop later in the Spring when the weather warms up and you get closer to installing the new one.
Before you invest time and money in a new boat, take it out (at least) a few times, to make sure it really suits your needs. You will never get your time or money back from boat projects so make sure the boat is really for you.
Jim
-
DelawareJim
- Deckhand
- Posts: 8
- Joined: Sat Jan 08, 2022 11:42 am
- Home Port: Delaware
Re: New Hard Top
I really enjoy reading and seeing these fiberglass projects, as I have never done one and learn something new with each thread!
Jim
Jim
-
DesertAlbin736
- Gold Member
- Posts: 2729
- Joined: Sun Mar 09, 2014 3:58 pm
- Home Port: Peoria, AZ USA
Re: New Hard Top
Melting cups: for small batches rectangular disposable plastic containers are handy, like the ones some types of lunchmeat come in, helps dissipate the amount of reaction heat you get when catalyzed resin is concentrated in the bottom of the cup. Too much catalyzed resin left in a container can be a fire hazard. Molding clay helps fillet inside corners on molds. But yeah, inside curves are challenging. The greater the radius the better. If you run short of enough resin to wet out a piece you should have enough working time to mix another batch and keep going. That's better than ending up with too much.You're right on the resin amount - wet it out, but it will be an experiment. Just a hair worried b/c some of the cloth pieces will require close to a quart of resin. I've melted cups with 2 oz of poly gelcoat and will need to get real smart on mixing. I am going to use gelcoat, but still plan to paint - the gelcoat is fairing material at a minimum. Good inside curves are challenging.
On the varnished hatches, which are actually varnish over clear epoxy resin, I made canvas covers for the cabin top grab rails. Heat & UV rays are the big problem here. Humidity levels are low, some times the single digits & dew points low enough that we rarely get dew condensing overnight & mornings We only average 6 or 7 inches of rain per year. That's life in the desert. The covers have kept them in good shape. I have had to re-do the varnished mahogany name boards on the sides of the doghouse. Summers are brutal here, but as we say, you don't have to shovel heat. That's when it's time to head to the Pacific NW.
You do not have the required permissions to view the files attached to this post. To view images, please register for a free account.
La Dolce Vita
1971 Albin 25 #736
Yanmar 3GM30F
Gig Harbor Boatworks Nisqually 8 dinghy
Residence: Peoria, AZ
Homeport: Lake Pleasant, AZ & beyond
1971 Albin 25 #736
Yanmar 3GM30F
Gig Harbor Boatworks Nisqually 8 dinghy
Residence: Peoria, AZ
Homeport: Lake Pleasant, AZ & beyond
-
trakus
- Gold Member
- Posts: 9
- Joined: Tue Oct 05, 2021 6:31 pm
- Home Port: Sidney, BC Canada
- Location: Victoria, BC
Re: New Hard Top
Man, that fiberglass hardtop is coming along really nicely. I decided to go the aluminum route for my A27FC and have attached a few pics of design and current state. Very interested to see pictures of your installed top when it's finished.
You do not have the required permissions to view the files attached to this post. To view images, please register for a free account.
-
DesertAlbin736
- Gold Member
- Posts: 2729
- Joined: Sun Mar 09, 2014 3:58 pm
- Home Port: Peoria, AZ USA
Re: New Hard Top
Nice workshop! I might be willing to kill for one like that!

La Dolce Vita
1971 Albin 25 #736
Yanmar 3GM30F
Gig Harbor Boatworks Nisqually 8 dinghy
Residence: Peoria, AZ
Homeport: Lake Pleasant, AZ & beyond
1971 Albin 25 #736
Yanmar 3GM30F
Gig Harbor Boatworks Nisqually 8 dinghy
Residence: Peoria, AZ
Homeport: Lake Pleasant, AZ & beyond
-
Ambler27FC
- Gold Member
- Posts: 195
- Joined: Sun Sep 08, 2019 8:10 pm
- Home Port: Patuxent River, MD
Re: New Hard Top
This might be obvious to more experienced folk, but a problem I've had with polyester resins and gel coat is mixing the hardener correctly. The directions are typically 'use half the hardener for half the can, and all of the hardener for the entire can'. Little comfort to someone mixing 2oz of gel coat.
The table below is based on the Total Boat material sheet for 70F degrees, but I suspect it applies more broadly. Their website recommends using less than the minimum, but according to tech support this is for higher temperatures (80-90F). So apparently the hardener volumes change quickly with temperature - which may be why there don't seem to be allot of published numbers.
There are dispenser for measuring larger MEKP volumes, but measuring syringes from the drug store or vet supply are great for 2-6oz batches.
There are apparently 591 'drops' per ounce, and let us all be thankful for the person that sat down and tested that one out.
You do not have the required permissions to view the files attached to this post. To view images, please register for a free account.
-
Ambler27FC
- Gold Member
- Posts: 195
- Joined: Sun Sep 08, 2019 8:10 pm
- Home Port: Patuxent River, MD
Re: New Hard Top
A few realizations / corrections:
A negative mold is probably the harder approach. I hope it is worth it. It took a few weekends and about 5 cans of wood filler to smooth things out. But that might be more about my skills with wood and a spreader. Plywood is - on close inspection - not flat. Using a composite material would have been smarter. Finishing with multiple layers of primer and paint to make sure there is no wood-grain print through.
It would probably have been smarter to use 1708 fiberglass, which is 2 layers of cloth at offset angles with a CSM backing. But I've already purchased my 100 yards of cloth/CSM - so it goes.
I had been told that you should not do more than 2 layers of fiberglass at once. On smaller parts I've found you can do 1/4" thickness over a couple hours without issue. Building up to ~1/2" thickness over a couple hours resulted in great warmth, but not 'where is the fire-extinguisher' warmth.
Laminating polyester really seems like the only way to go for larger parts. I'll still use epoxy for the small repairs. But with buying either Poly and Epoxy I think I will pay more attention to the shelf life, which is only 6-12 months.
You do not have the required permissions to view the files attached to this post. To view images, please register for a free account.
-
Ambler27FC
- Gold Member
- Posts: 195
- Joined: Sun Sep 08, 2019 8:10 pm
- Home Port: Patuxent River, MD
Re: New Hard Top
A few weeks out from attempting to mount this hard-top. Only some finishing layers of fiberglass, fairing the interior, and painting left.
With 5 layers of wax and 2 layers of PVA, the outer skin separated from the mold amazingly easy. I had grabbed a mallet and planned on an hour to separate the part from the mold, but it was one quick pull and done! I think the trick was spraying the PVA. Using a brush to apply PVA for very small parts was a very different experience.
Added some beams along the outside to create surfaces to mount channels to hang canvas and to strengthen the form. Filled the void created with 6lb mix-and-pour foam (which was very easy to work with) before glassing over. Because Polyester contracts this ended up warping the outer edges, but putting a straight edge on the factory hardtop (which was much worse) this is a common situation that nobody will notice.
Ended up using balsa core because the foam sheets I wanted was hard to get, so I'll have to backfill any holes with epoxy. Balsa soaks up an amazing amount of resin, and I could have saved probably a gallon of resin and 10lbs using foam.
For an inexperienced user the 10oz cloth and 3/4oz matt was very easy to wet out with a 6" roller. I experimented 1708 on the final layers, and that seemed to require the pour-and scrape method. It's not possible (or easy?) to pre-wet a 3'x7' sheet so I was soaking from the top down and have air bubbles to grind out.
You do not have the required permissions to view the files attached to this post. To view images, please register for a free account.
-
Ambler27FC
- Gold Member
- Posts: 195
- Joined: Sun Sep 08, 2019 8:10 pm
- Home Port: Patuxent River, MD
Re: New Hard Top
Well, I think I am going to declare success and close this post out. Still work to do - finish fiber-glassing the joint, touch, up paint, mounting hand rails, etc. - but all of my original questions have now been answered.
The 1/8" fiberglass, 3/4" core, 1/8" fiberglass construction was more than stiff enough. In fact it is noticeably stiffer than the factory hard-top which on closer inspection may have a 1/2" core. Might stiffen up the factory hard-top next year. No beams were required across the center, but I did box-out the sides and back for strength - and to mount channels for the curtains.
I used four 1" stainless tubes to support the back so that I wouldn't have to engage a welder. They don't look like much, but they are plenty strong. Solid fiber glass pucks with a 15 degree top were used to mount the tubes. These pucks were to angle the poles to match the back cabin angle, but they were very useful to position the poles since neither the deck or hardtop are flat.
Many thanks for all of the helpful suggestions! Preparing for two weeks of sewing curtains...
You do not have the required permissions to view the files attached to this post. To view images, please register for a free account.
-
DesertAlbin736
- Gold Member
- Posts: 2729
- Joined: Sun Mar 09, 2014 3:58 pm
- Home Port: Peoria, AZ USA
Re: New Hard Top
Very nice job! Looks absolutely professional! No one would ever guess it was DIY. Could pass for an OEM installed option. Now when you make your side curtains they could incorporate zip in or or sewn in windows, screens, and outer flaps. What I did was adapt Sailrite's technique for a sailboat companionway hatch cover.
https://www.youtube.com/watch?v=JzNVI3PSUKQ
This other tutorial might be better than how I did mine. On mine the sun screen is permanently sewn in with the whole thing able to roll up & the vinyl windows attach separately with velcro. This zipper version might work better for you. In my case I wanted the vinyl windows to be completely removable because of the heat issue we have here when my boat is sitting on the trailer in 115 degree summer desert heat. Most of the time we don't need the vinyl windows anyway except in cold and/or rainy weather, which of course we don't get much of. But the UV rays here are very tough on vinyl so most of the time I don't want them installed & exposed to sun & heat.
https://www.sailrite.com/Installing-Zip ... reen-Video
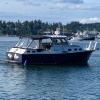
But with side curtains where you can roll up the vinyl windows & zip screens in, plus have canvas flaps available for complete privacy and sun protection would be great, especially if you have an air conditioner that could cool the whole boat. We've been on the Chesapeake including the Patuxent & over in Cambridge, Oxford, & St. Michaels in July's hot, humid, stormy weather & know how miserable that can be without air conditioning & buggy without screens. Which by the am trying to guess from your pictures where your boat is docked. Looks like somewhere on Back Creek, like maybe the Merrick properties on Oyster Bay Place? Unless you're over on the South/West side of the river, someplace like "Boatel California"? There aren't many marinas on the Patuxent that have wide finger piers at 90 degrees to the main walkway.
https://www.youtube.com/watch?v=JzNVI3PSUKQ
This other tutorial might be better than how I did mine. On mine the sun screen is permanently sewn in with the whole thing able to roll up & the vinyl windows attach separately with velcro. This zipper version might work better for you. In my case I wanted the vinyl windows to be completely removable because of the heat issue we have here when my boat is sitting on the trailer in 115 degree summer desert heat. Most of the time we don't need the vinyl windows anyway except in cold and/or rainy weather, which of course we don't get much of. But the UV rays here are very tough on vinyl so most of the time I don't want them installed & exposed to sun & heat.
https://www.sailrite.com/Installing-Zip ... reen-Video
But with side curtains where you can roll up the vinyl windows & zip screens in, plus have canvas flaps available for complete privacy and sun protection would be great, especially if you have an air conditioner that could cool the whole boat. We've been on the Chesapeake including the Patuxent & over in Cambridge, Oxford, & St. Michaels in July's hot, humid, stormy weather & know how miserable that can be without air conditioning & buggy without screens. Which by the am trying to guess from your pictures where your boat is docked. Looks like somewhere on Back Creek, like maybe the Merrick properties on Oyster Bay Place? Unless you're over on the South/West side of the river, someplace like "Boatel California"? There aren't many marinas on the Patuxent that have wide finger piers at 90 degrees to the main walkway.
You do not have the required permissions to view the files attached to this post. To view images, please register for a free account.
La Dolce Vita
1971 Albin 25 #736
Yanmar 3GM30F
Gig Harbor Boatworks Nisqually 8 dinghy
Residence: Peoria, AZ
Homeport: Lake Pleasant, AZ & beyond
1971 Albin 25 #736
Yanmar 3GM30F
Gig Harbor Boatworks Nisqually 8 dinghy
Residence: Peoria, AZ
Homeport: Lake Pleasant, AZ & beyond